
Spring Boot ile JSF Merhaba Dünya
Spring Boot JSF Örneği
1 Spring Projesi Oluştur
Spring Boot ile Merhaba Dünya uygulamamızı oluşturmak için springin bize sundugu https://start.spring.io/ adresine gidelim.
Proje bilgilerini dolduralım.Örneğimizi oluşturalım.
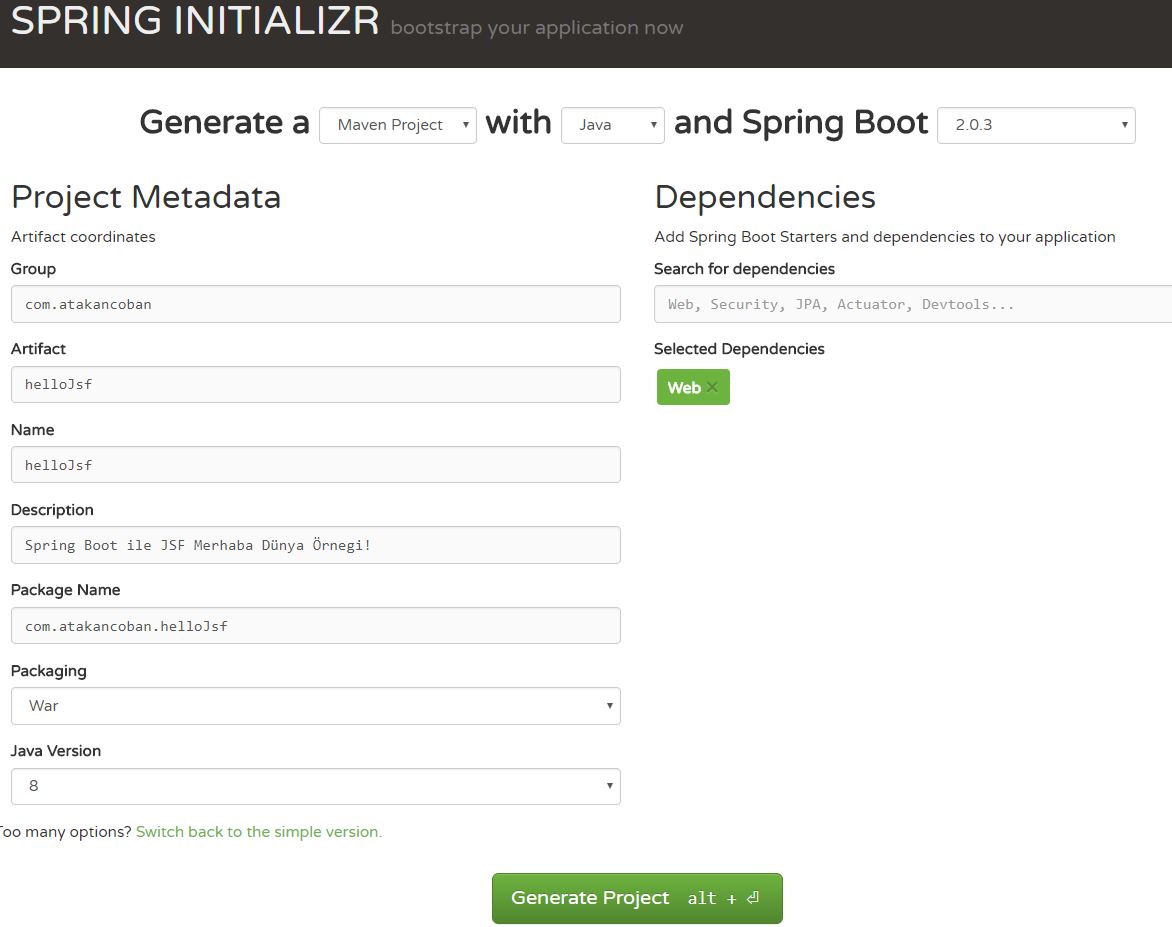
Bilgileri doldurtuktan sonra Generate Project’e tıklayarak zip halinde indirelim.Zıp dosyasını açalım.
Eclipse’i açarak projemizi import edelim.(Benim Eclipse’imde JBOSS WEB TOOLS eklentisi kurulu.Yazının ilerisinde bazı menüler neden benim eclipse’imde yok demeyin 🙂 örn:new xhtml file kısmı gibi )
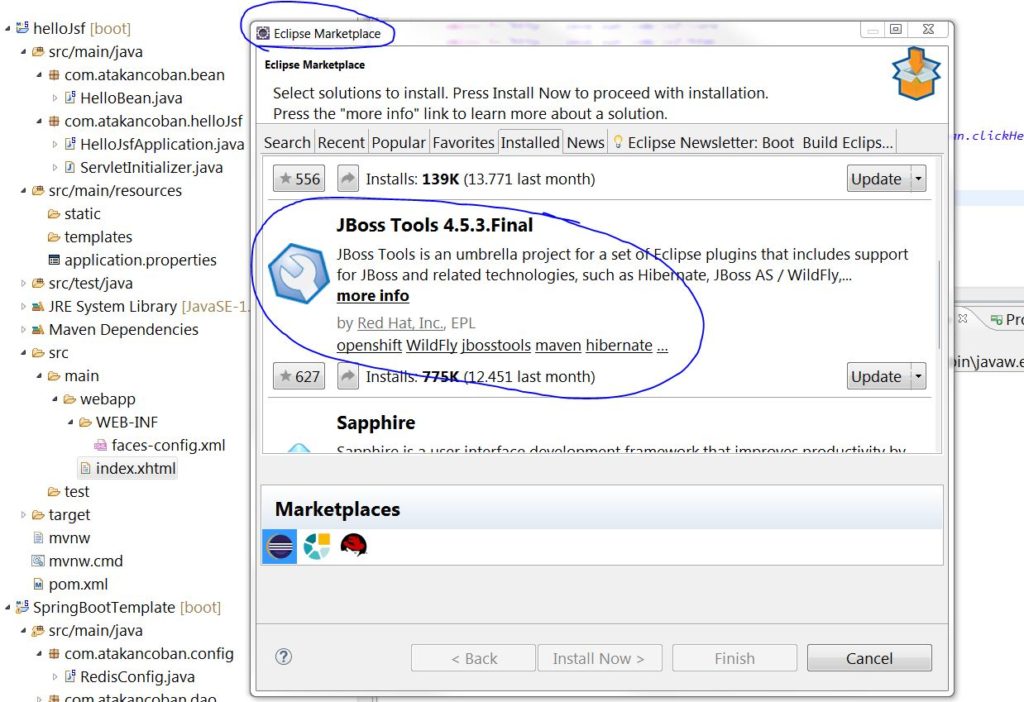
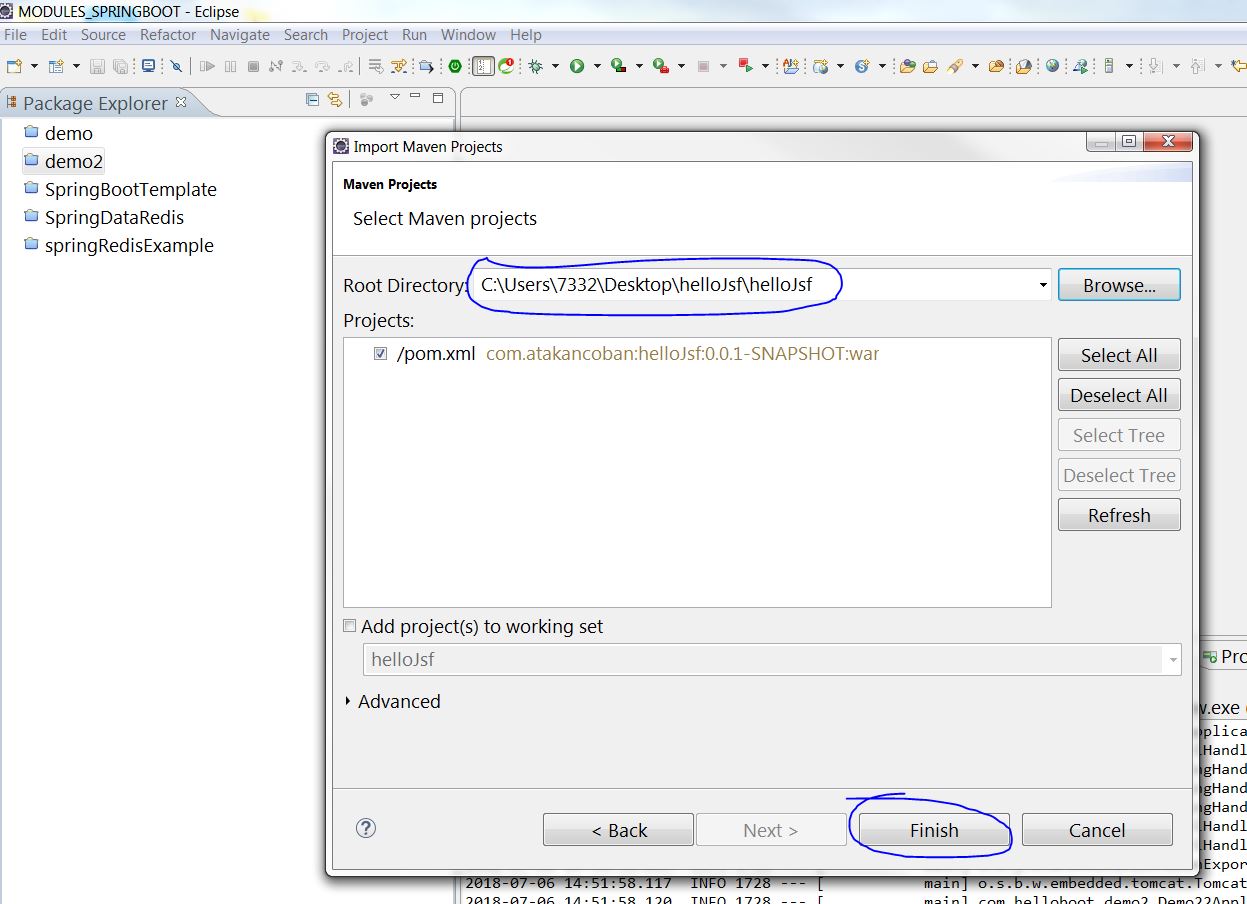
Eclipse açtık import edelim
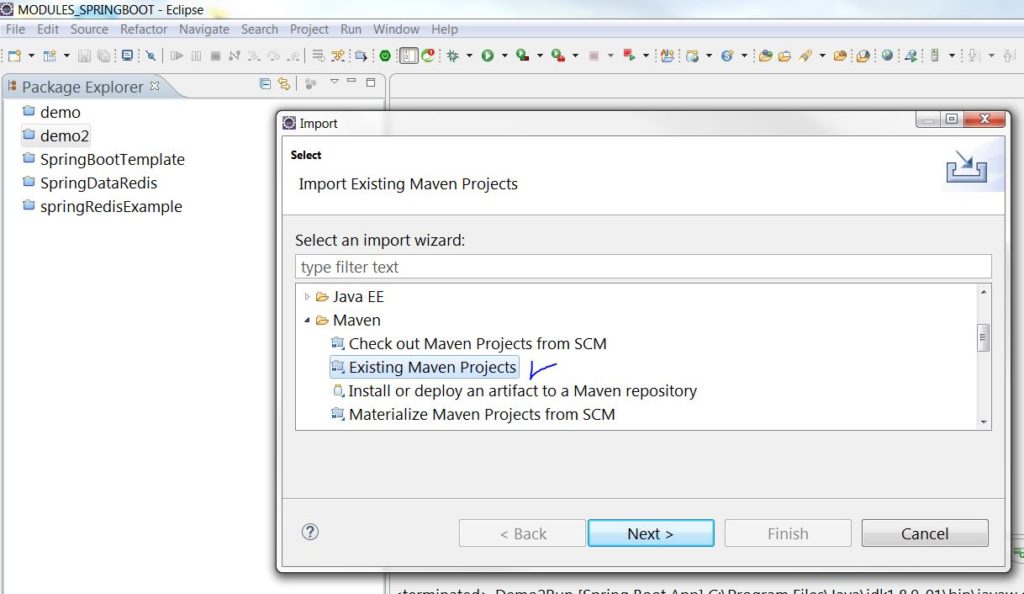
Maven projesi olarak seçelim ve devam edelim
2 Spring Projesini JSF ile ilişkilendir
Projemizi ekledik. Şimdi JSF ile entegrasyon yapalım.
Oncelike webapp> altında WEBINF klasoru ve facesconfig.xml dosyasını oluşturalım.Spring ile bağlamak için gerekli.
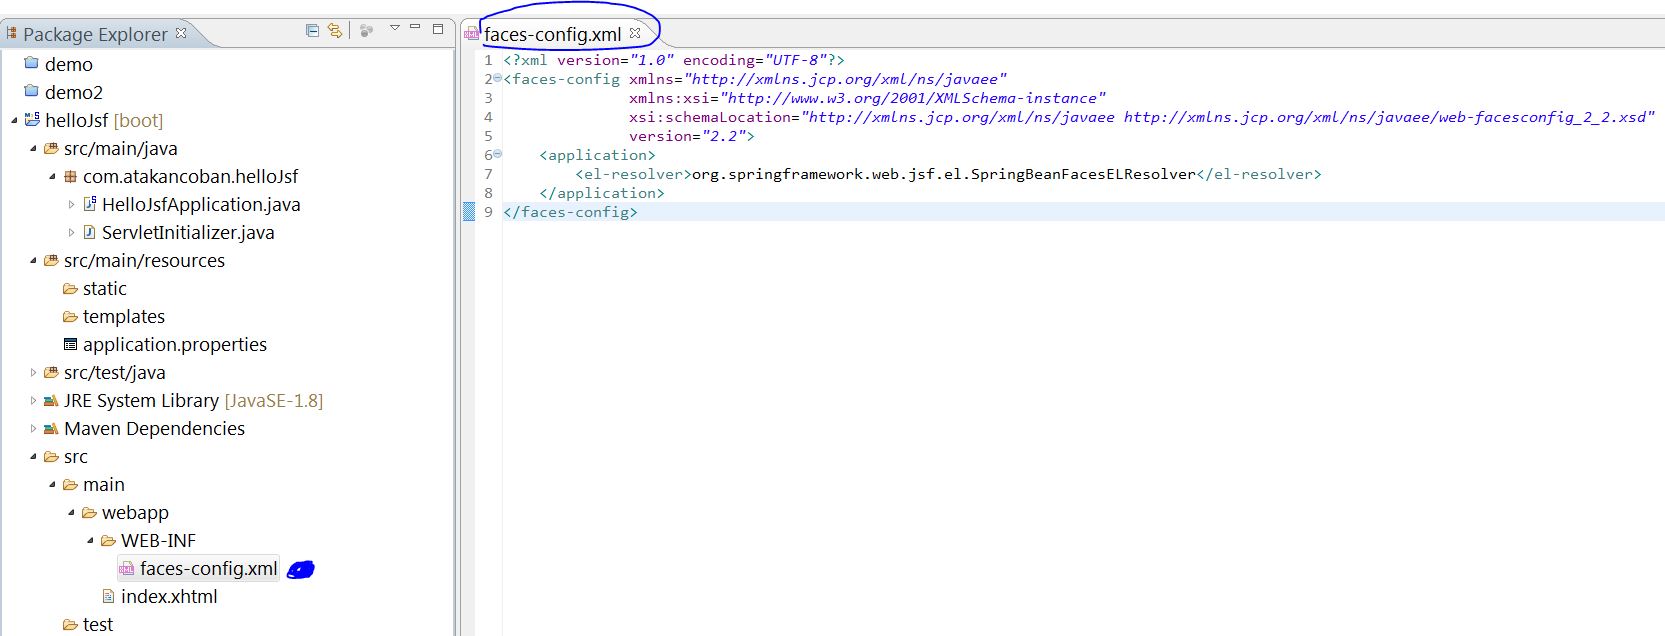
facesconfig.xml
<?xml version="1.0" encoding="UTF-8"?>
<faces-config xmlns="http://xmlns.jcp.org/xml/ns/javaee" xmlns:xsi="http://www.w3.org/2001/XMLSchema-instance" xsi:schemaLocation="http://xmlns.jcp.org/xml/ns/javaee http://xmlns.jcp.org/xml/ns/javaee/web-facesconfig_2_2.xsd" version="2.2">
    <application>
        <el-resolver>org.springframework.web.jsf.el.SpringBeanFacesELResolver</el-resolver>
    </application>
</faces-config>
Pom XML içinde jsf kütüphanelerini ve tomcat ile ilişkilendirmek için tomcat embed kütüphanesini ekleyelim.

Pom XML
<?xml version="1.0" encoding="UTF-8"?>
<project xmlns="http://maven.apache.org/POM/4.0.0" xmlns:xsi="http://www.w3.org/2001/XMLSchema-instance" xsi:schemaLocation="http://maven.apache.org/POM/4.0.0 http://maven.apache.org/xsd/maven-4.0.0.xsd">
	<modelVersion>4.0.0</modelVersion>

	<groupId>com.atakancoban</groupId>
	<artifactId>helloJsf</artifactId>
	<version>0.0.1-SNAPSHOT</version>
	<packaging>war</packaging>

	<name>helloJsf</name>
	<description>Spring Boot ile JSF Merhaba Dünya Örnegi!</description>

	<parent>
		<groupId>org.springframework.boot</groupId>
		<artifactId>spring-boot-starter-parent</artifactId>
		<version>2.0.3.RELEASE</version>
		<relativePath /> <!-- lookup parent from repository -->
	</parent>

	<properties>
		<project.build.sourceEncoding>UTF-8</project.build.sourceEncoding>
		<project.reporting.outputEncoding>UTF-8</project.reporting.outputEncoding>
		<java.version>1.8</java.version>
		<jsf.version>2.2.9</jsf.version>
	</properties>

	<dependencies>
		<!-- Spring Dependency -->
		<dependency>
			<groupId>org.springframework.boot</groupId>
			<artifactId>spring-boot-starter-web</artifactId>
		</dependency>

		<dependency>
			<groupId>org.springframework.boot</groupId>
			<artifactId>spring-boot-starter-tomcat</artifactId>
			<scope>provided</scope>
		</dependency>
		<dependency>
			<groupId>org.springframework.boot</groupId>
			<artifactId>spring-boot-starter-test</artifactId>
			<scope>test</scope>
		</dependency>

		<!-- JSF Dependency -->
		<dependency>
			<groupId>com.sun.faces</groupId>
			<artifactId>jsf-api</artifactId>
			<version>${jsf.version}</version>
		</dependency>
		<dependency>
			<groupId>com.sun.faces</groupId>
			<artifactId>jsf-impl</artifactId>
			<version>${jsf.version}</version>
		</dependency>

		<!-- Tomcat Embed Dependency -->
		<dependency>
			<groupId>org.apache.tomcat.embed</groupId>
			<artifactId>tomcat-embed-jasper</artifactId>
		</dependency>
	</dependencies>

	<build>
		<plugins>
			<plugin>
				<groupId>org.springframework.boot</groupId>
				<artifactId>spring-boot-maven-plugin</artifactId>
			</plugin>
		</plugins>
	</build>


</project>
Pom xml dosyamızı düzenledikten sonra Maven Clean ve Maven Install işlemlerini yaparak kütüphaneleri projeye ekleyelim.
SpringBootApplication Konfigrasyonunu tamamlayalım.
Tomcat tarafından xhtml uzantılı sayfalara gelen istekleri yakalaması gerektiğini ,projenin hangi paketlerinde geçerli olduğunu gibi temel config bilgilerini buradan ilişkilendiriyoruz.

HelloJsfApplication.java
package com.atakancoban.helloJsf;


import javax.faces.webapp.FacesServlet;

import org.springframework.boot.SpringApplication;
import org.springframework.boot.autoconfigure.SpringBootApplication;
import org.springframework.boot.web.servlet.ServletContextInitializer;
import org.springframework.boot.web.servlet.ServletListenerRegistrationBean;
import org.springframework.boot.web.servlet.ServletRegistrationBean;
import org.springframework.context.annotation.Bean;
import org.springframework.context.annotation.ComponentScan;
import org.springframework.context.annotation.Configuration;

import com.sun.faces.config.ConfigureListener;


@SpringBootApplication
@Configuration
@ComponentScan("com.atakancoban")
public class HelloJsfApplication {

	public static void main(String[] args) {
		SpringApplication.run(HelloJsfApplication.class, args);
	}

	//JSF Configration Başlangıc
	@Bean
	public ServletRegistrationBean<FacesServlet> facesServletRegistraiton() {
		ServletRegistrationBean<FacesServlet> registration = new ServletRegistrationBean<FacesServlet>(new FacesServlet(),
				new String[] { "*.xhtml" });
		registration.setName("Faces Servlet");
		registration.setLoadOnStartup(1);

		return registration;
	}

	@Bean
	public ServletContextInitializer servletContextInitializer() {
		return servletContext -> {
			servletContext.setInitParameter("com.sun.faces.forceLoadConfiguration", Boolean.TRUE.toString());
		};
	}

	@Bean
	public ServletListenerRegistrationBean<ConfigureListener> jsfConfigureListener() {
		return new ServletListenerRegistrationBean<ConfigureListener>(new ConfigureListener());
	}
	//JSF Configration Sonu
}
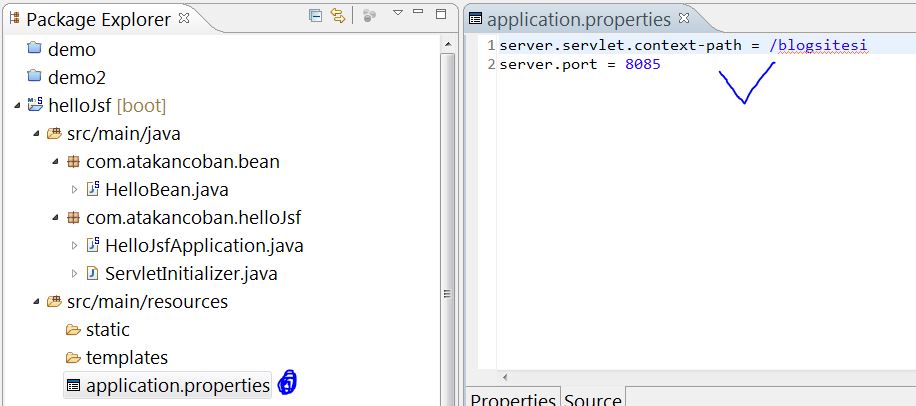
Application Properties dosyasını düzenleyelim.
Tomcat port ve proje dizini bilgilerini ekledim.Projemizin çalışma linkini bu bilgilere göre kullanıyoruz.
http://localhost:8085/blogsitesi/index.xhtml
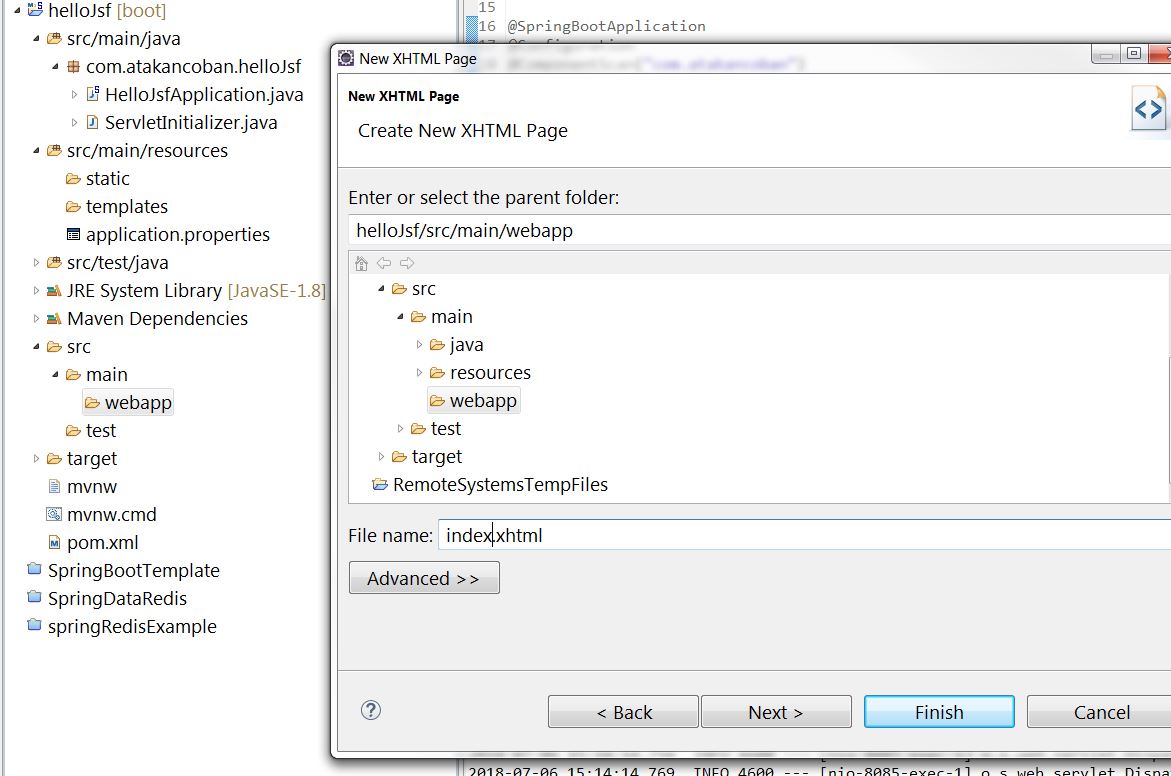
Şimdi bir web sayfası ekleyelim.Bunun için bendeki Jbos Tool eklentisi kurulu olduğu için new Xhtml File menüsü geliyor.Kolayca oluşturalım
webapp > sağ click > new > XHTML File
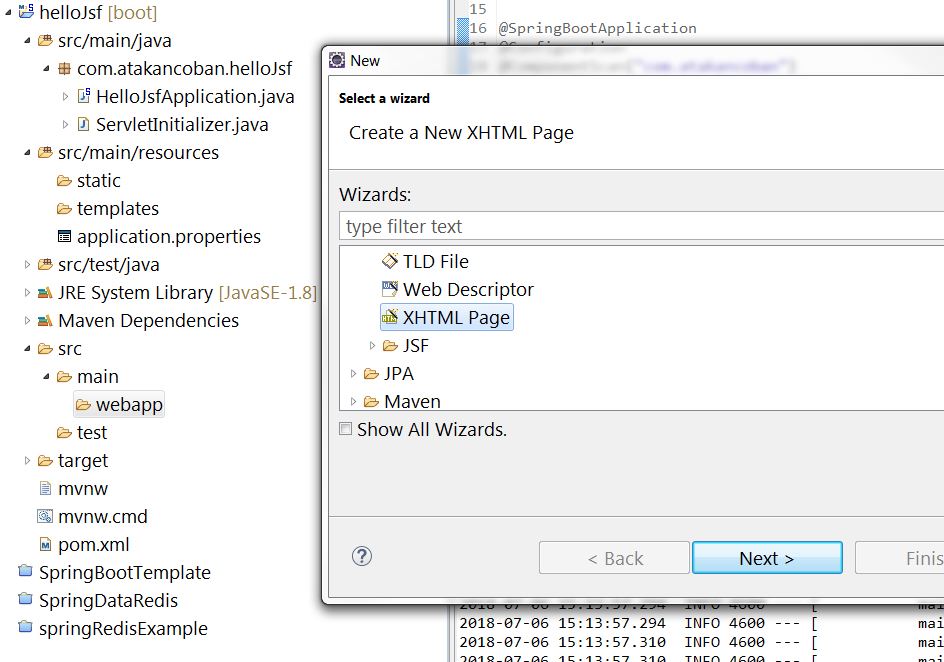
index.xhtml olarak düzenledim.Başka sayfalar için isim değişebilir örneğinize kalmış..
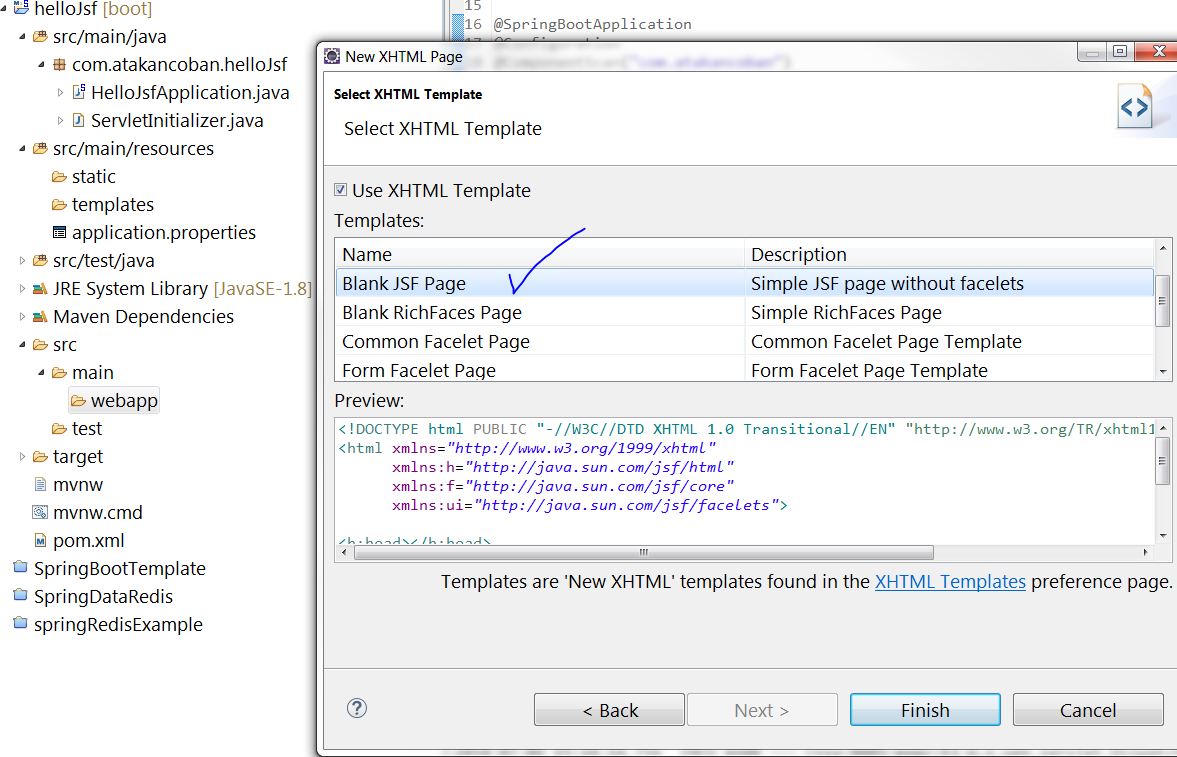
Blank JSF Page seçelim , xlmns bilgilerini eklemesi için normalde bu tagleri sizde ekleyip bu xhtml sayfasını oluşturabilirsiniz.Ben jboss tool ile örnek vermek istedim.
Index xhtml sayfama örnek componentler ekledim. Label üzerine HelloBean sınıfımdaki message alanını ve Butona HelloBean sınıfındaki clickHelloWorldButton() metodunu bağladım.
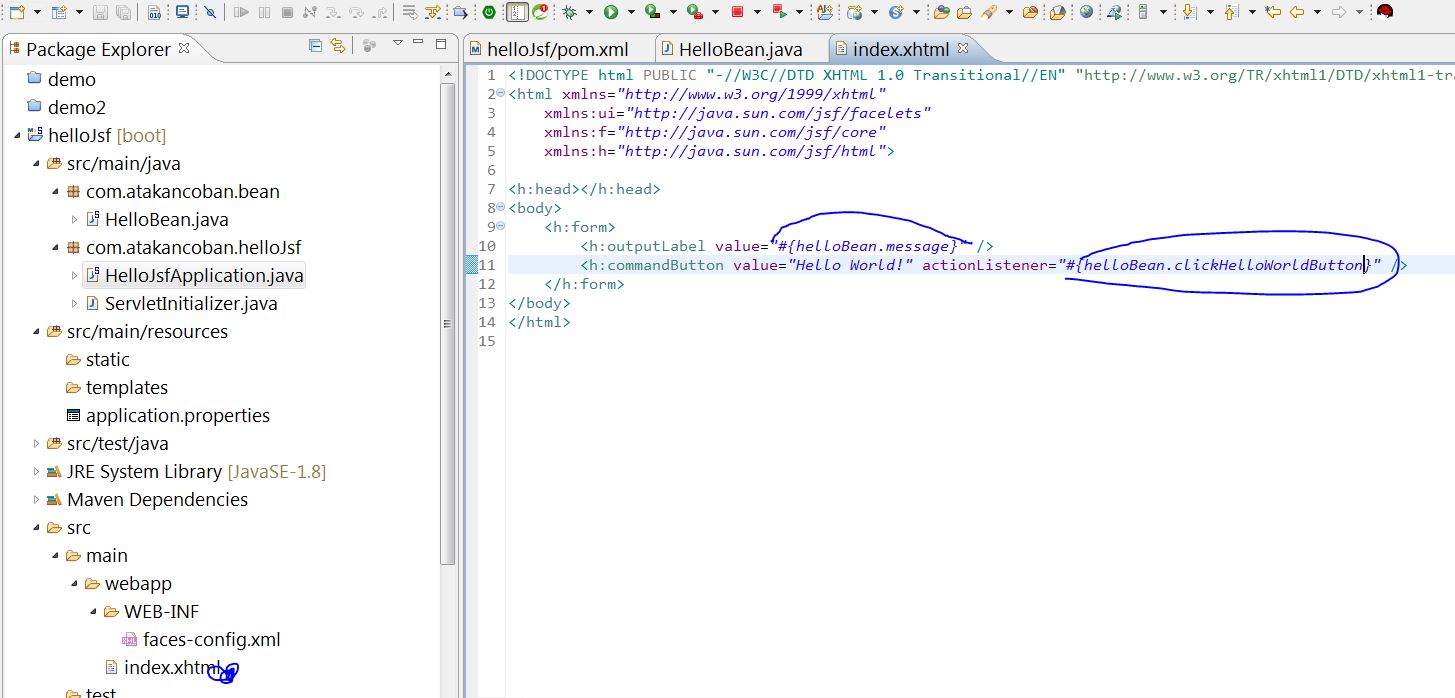
<!DOCTYPE html PUBLIC "-//W3C//DTD XHTML 1.0 Transitional//EN" "http://www.w3.org/TR/xhtml1/DTD/xhtml1-transitional.dtd">
<html xmlns="http://www.w3.org/1999/xhtml" xmlns:ui="http://java.sun.com/jsf/facelets" xmlns:f="http://java.sun.com/jsf/core" xmlns:h="http://java.sun.com/jsf/html">

<h:head></h:head>
<body>
	<h:form>
		<h:outputLabel value="#{helloBean.message}" />
		<h:commandButton value="Hello World!" actionListener="#{helloBean.clickHelloWorldButton}" />
	</h:form>
</body>
</html>
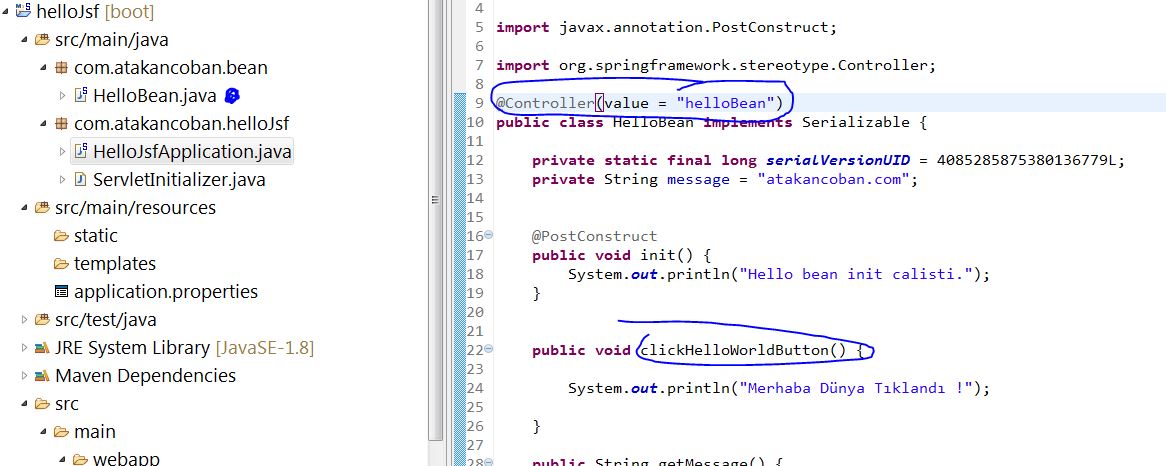
HelloBean (Index.xhtml sayfasını yöneten sınıf)(MVC kavramındaki View kısmı araştırabilirsiniz)
index.xhtml sayfasında ilişkilendirdiğim değişken ve metod burada.
HelloJsfApplication > Sağ Tık > SpringBootApp menüsü ile projeyi çalıştıralım ve linkimiz http://localhost:8085/blogsitesi/index.xhtml
Sitemizi açalım ve sonucu görelim. 🙂
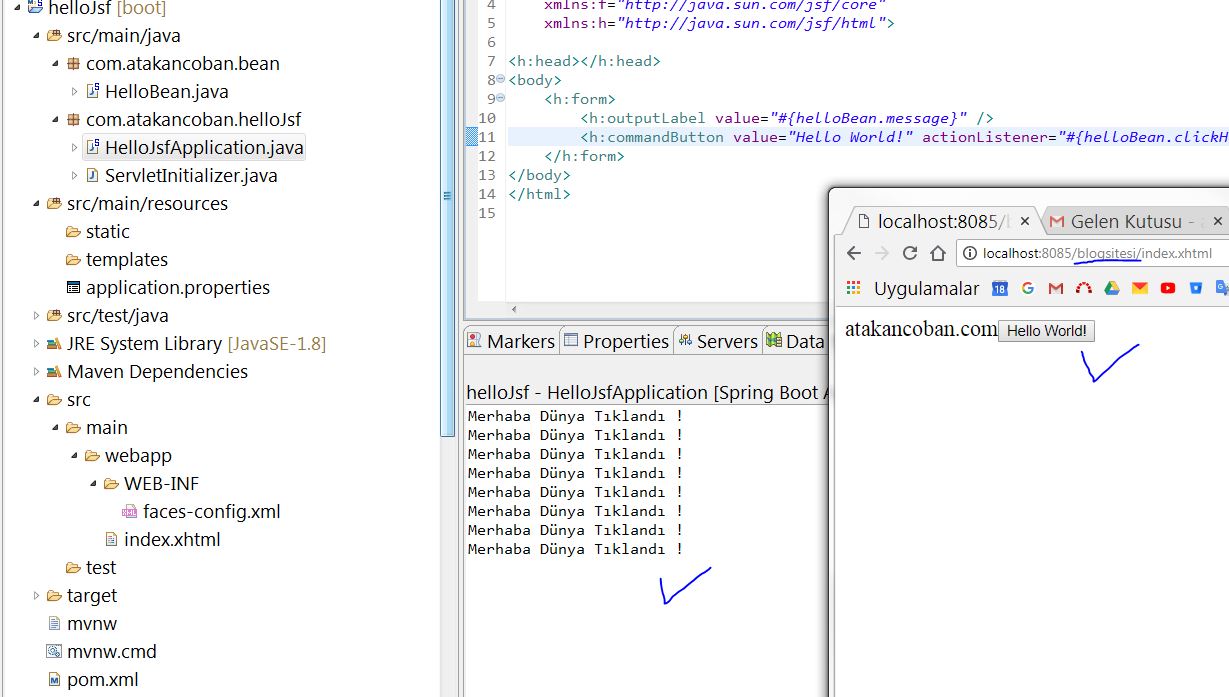
Projenin son halini buradan indirebilirsiniz.
İyi Çalışmalar